I’ve been slowly building up my home studio over the years. I’ve purchased speakers, monitors, televisions, computer parts, keyboards, interfaces… all that fun stuff. However when it comes to some things, I look at the price and just get angry.
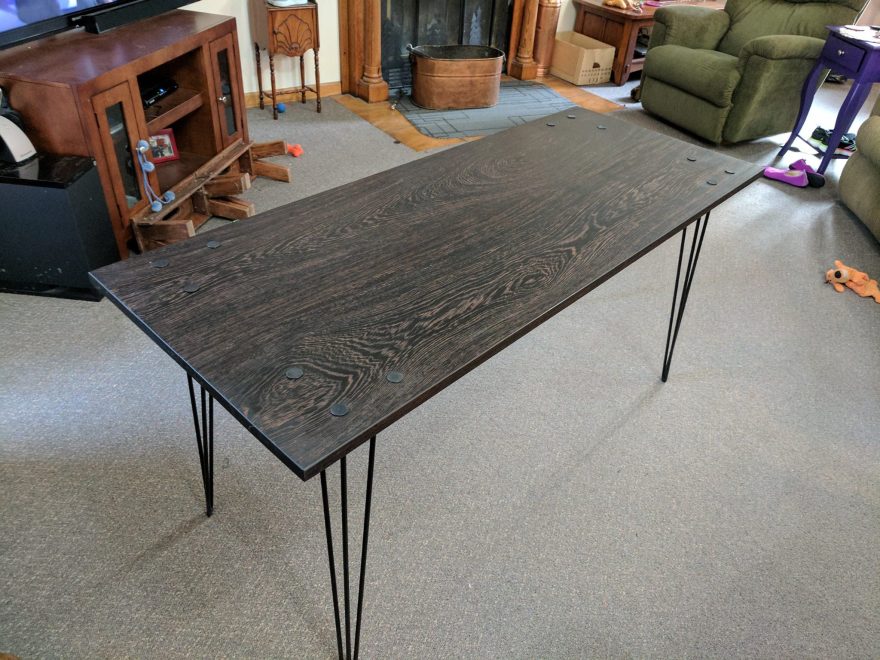
One of those things is high quality solid desks. I couldn’t find anything like what I wanted that didn’t cost a ridiculous (to me) amount of money. So, I built my own out of exotic (Wenge) wood, and it still cost me less than a quarter of what I could find shopping.
Of course, the main reason I find prices for proper desks ridiculous is I have the skills and equipment available to build one myself. The same was true when I went to look at diffusers. I wanted something classy looking, preferably wood, and the prices were insane! So, I set off to build my own.
First, a little disclaimer: I am no acoustical engineer. While the concept of a diffuser and its function is easy to understand, I realize there is a lot more that can go into designing a diffuser specifically for the space it’s in and/or the desired frequencies to control. If I’m being perfectly honest, my current space is probably fine without a diffuser, there are plenty of other things to disperse reflections and absorb sound. I built this with the assumption that it will help in future spaces, and it just looks cool!
Now, on to the build:
I quickly realized that most of the wood diffusers I saw were little more than square boards cut up randomly and glued together. So, the first thing I bought were some 2″x2″s (actually 1 ½”). I wanted something fairly light in weight and color. In weight… because after doing the math I realized there would be around 80 feet of board used when all was said and done. In color… because I wanted to keep my options open when it came to finishing the wood. The cheapest option was plain old construction lumber:
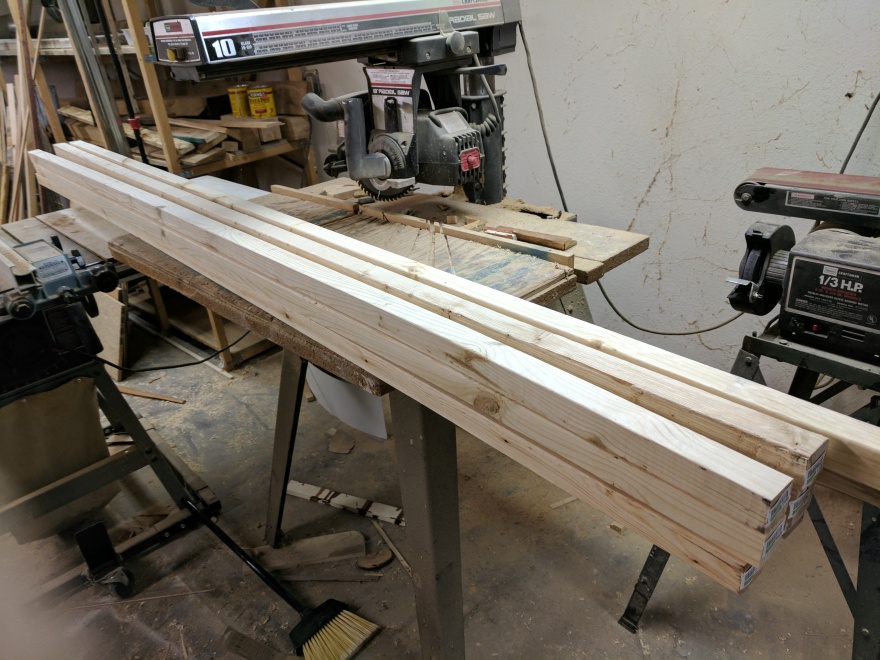
When I was picking up the lumber I realized the edges were quite rounded. I wanted a bit more of a sharp look, so I decided to run all the boards through a planer. I could’ve just purchased higher quality boards, but I think subconsciously I wanted to build this as cheap as possible to make a point. Also, running the boards through the planer helped ensure all the boards were as close to the same dimensions as possible.

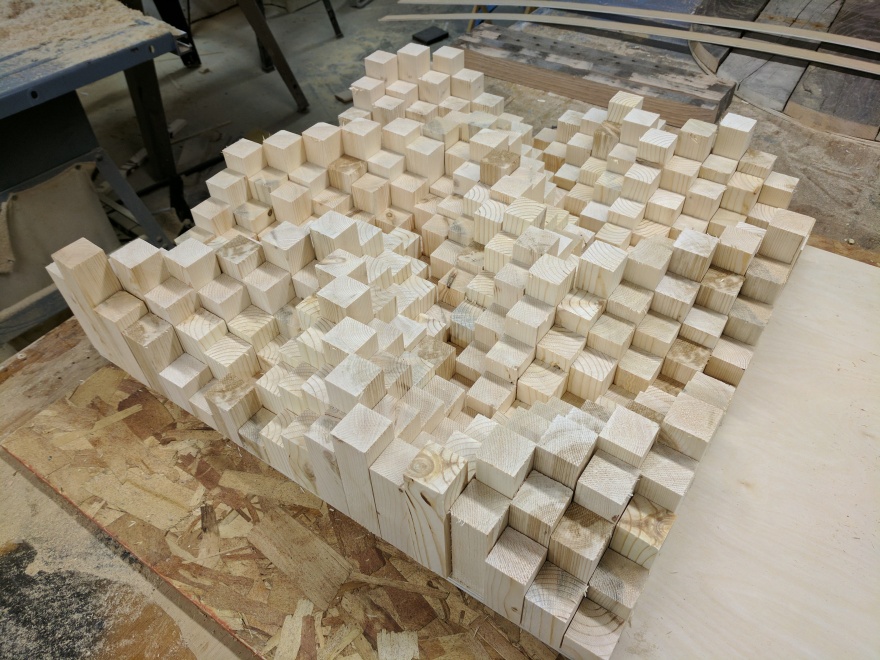
With my sharpened 2×2’s ready, it was on to slicing them up to size. My first thought was to cut them up at random, but I opted for a more controlled approach at first as I wasn’t sure about how I’d lay them out quite yet. First, I had to decide what the shortest and longest pieces would be. I wanted this to be a fairly bold piece, so I opted for 1″ at it’s shortest, and 5″ at it’s longest. To simplify things, I chose to have five different board lengths… one for each inch. I marked this out on a radial arm saw and got to cutting. To keep things from being too uniform, I never made the lengths exactly the same. Each 2″ board might end up being, say, a half inch shorter or longer.
Since I was unsure about lay out, I first cut out equal numbers of each length. As I was setting them down after each cut, I ended up with a pyramid type pattern that I thought was neat looking:

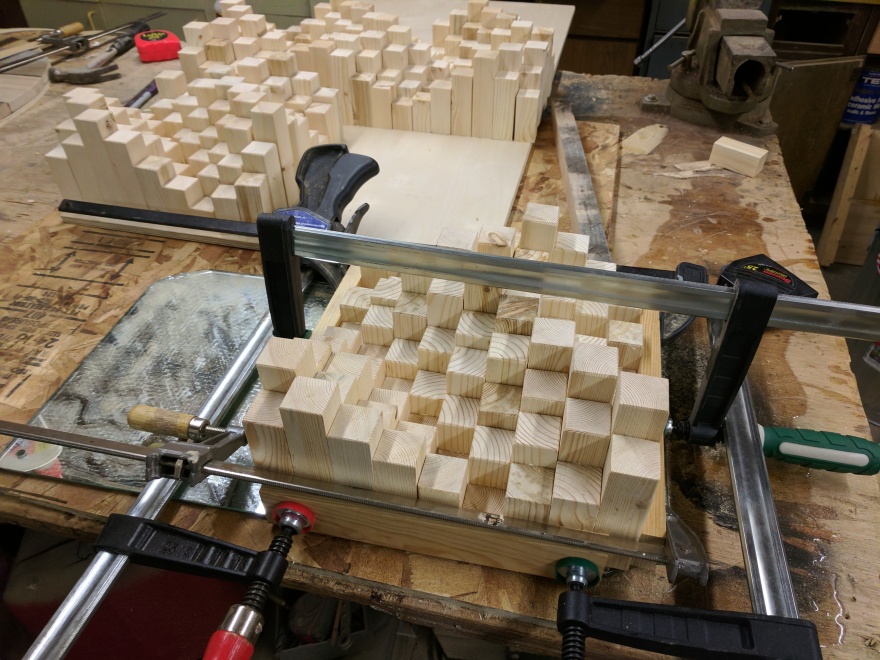
I tried a few different layouts, before eventually finding myself back at the unintentional “pyramid” layout. I eventually realized that shifting individual rows led to some really neat looking designs. Then it suddenly hit me… how meta would it be to have a diffuser that looked like a sound wave? I shifted things around and started out a layout like this:

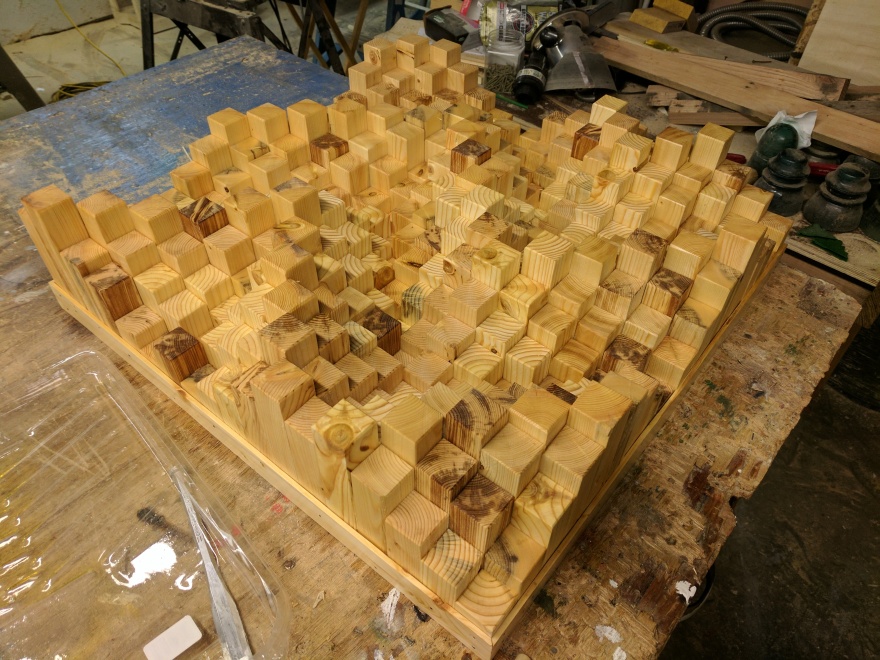
As you can see from the backer board, I originally set out to build a 2’x4′ diffuser, but after realizing the sheer weight, I opted for a 2’x2′!
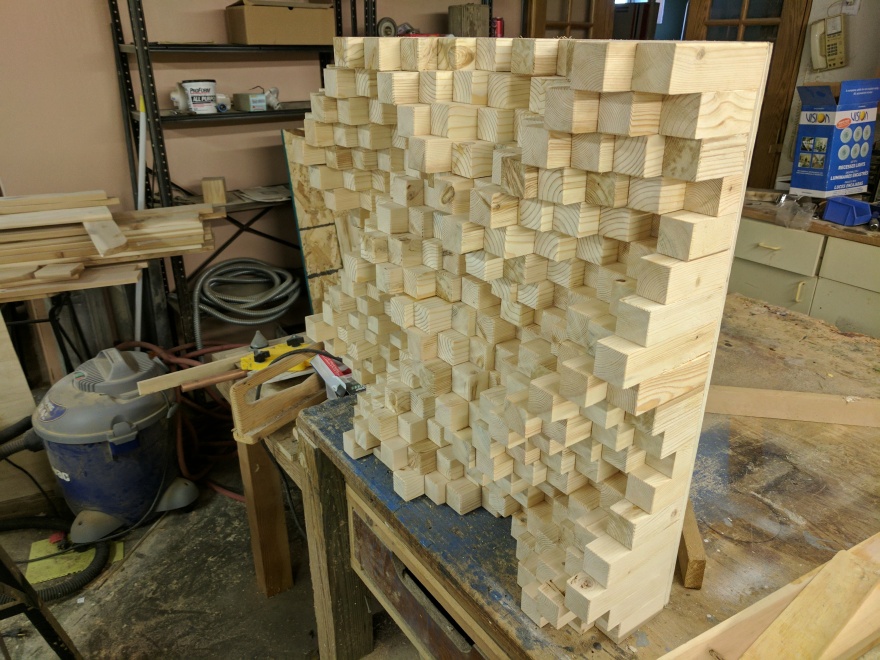
Anyways, it was sort of rinse and repeat after I figured out the layout. A bunch of cutting, sanding, and setting until I ended up with this:

At this step, I noticed that since I was laying each piece down sequentially, the different color and texture of each individual 8′ board was showing, particularly in the last rows. So, I randomized things a bit, swapping out similar length boards.
Ahhh, that’s better. After sanding everything down a bit, it was on to the tedious act of gluing everything together. Had I been a smarter man, I would first stained/finished the boards before this!
Nevertheless, I knew it would be almost impossible to glue/clamp all 324 pieces at once properly. I decided a quarter section at a time was reasonable and got to work:
Even working with just 81 pieces was daunting enough. Making sure things stayed square and in line with each other was the main goal here.
This was repeated three more times, and each quarter piece was then of course glued together. The last bit of construction was gluing the pieces to the back panel:

These clamps were probably a bit overkill to be honest. The weight of the assembled pieces would’ve probably been enough. But, I had these fancy new clamps and wanted to put them to use.
There we go! All together. On to the finish.
In my experience, I’ve found finishing pieces with oils is a bit more of a forgiving experience than stain and poly. Easy to apply, and much less likely to have visible inconsistencies after everything dried up.
I didn’t want to color anything too much, just highlight the grain, so I went with my standby natural colored danish oil. Applying it was a bit tedious but not too bad. After a couple of coats, I ended up with this:
I was really happy with how the finish turned out. The differences between the boards were really highlighted, and the grain patterns popped out. I’m a big fan of not covering up wood’s natural beauty, so I left it at that. I purchased some hardware to hang it on a wall and called it art!

It’s always good after a project to do a sort of post-mortem to identify what you could do to improve the process and/or final product. If I were to build another diffuser, there are two main things I’d do differently:
1. Use even lighter weight material
I’d probably try something like balsa or even a dense foam. Those small pieces of wood quickly add up. While I didn’t weigh it, I’m guessing the final product was maybe 30-40 lbs.
2. Finish the wood before gluing
I could’ve had a lot more options for finishes had I done this. When everything was glued up, this design in particular meant reaching into a lot of nooks and not missing anything. To realistically do that, oil was by far the easiest option. Had I finished before hand, I could’ve went with anything.
If you have the equipment available to you and the time to do it, I can’t recommend building your own studio furniture enough. It’s MUCH cheaper and can really make the space feel like your own. Feel free to ask any questions you might have in the comments.
Cheers!

